Uploading Files to Google Cloud Storage
March 3, 2017
On 2/28/2017 Amazon AWS S3 had an outage which affected a lot of websites. This got me thinking if Google Cloud offered a solution which was similar to S3. In this blog I will be creating a simple API where you can upload a file which would upload it to Google Cloud Storage.
I will be using restify to on the backend and using boilerplate I created, which can be found here.
First clone the boilerplate locally using the following command
git clone https://github.com/binoy14/restify-boilerplate.git GCloudStorageOnce inside the folder, we will install google cloud storage’s npm module, which can be found here.
yarn add @google-cloud/storage

or

npm install --save @google-cloud/storage
Before we write any code, we need to configure Google Cloud Storage on Google Developer Console. Follow the following steps to get the Cloud Platform ready for use.
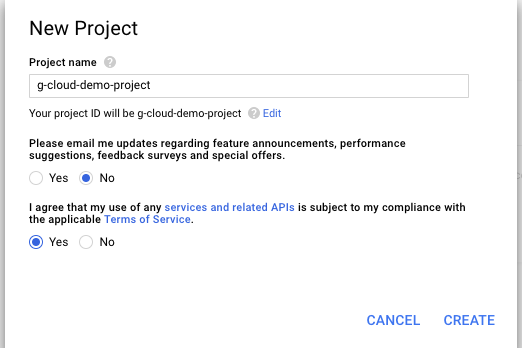
- Create a new project on Google Developer Console
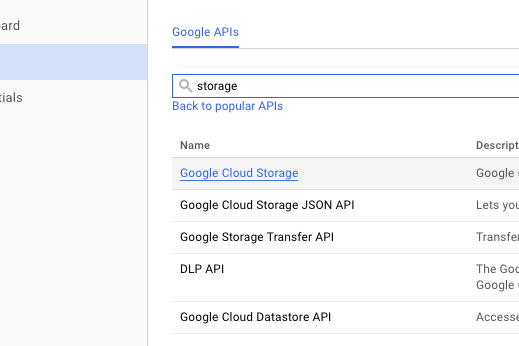
- Enable Google Cloud Storage for your project. This API can be found by clicking on Library in the sidebar and in the searching for storage
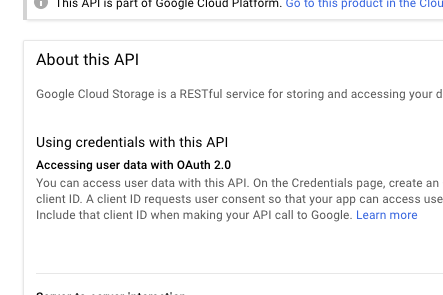
Click on Enable in the Google Cloud Storage Page
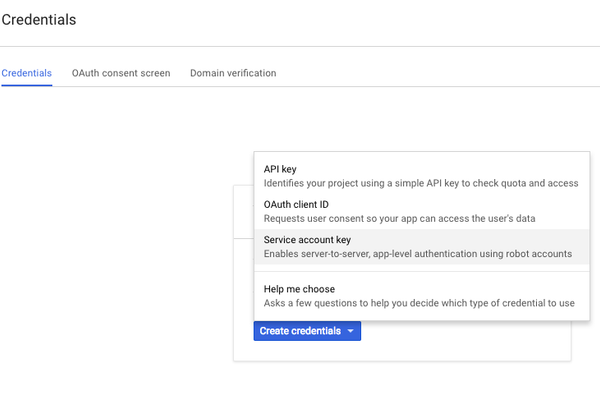
- To use this API we will need to create credentials and to do so we will navigate to credentials page by clicking on Credentials in the sidebar. On the create credentials dropdown choose service account key option. And when on create service account page we will choose the below config and download the JSON file inside our project.
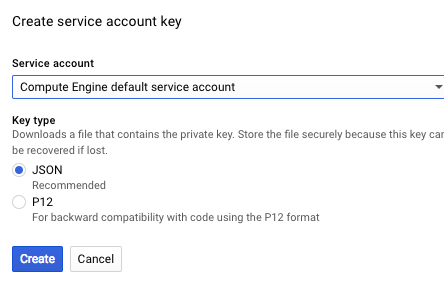
- Next, we need to create a bucket on Google Cloud Storage. Note: The name of the bucket needs to be unique
- (Optional) The Final step is to make our files read public so we can return a URL from our API. To do so we need to install Google Cloud SDK using this link and run the following command.
gsutil defacl ch -u allUsers:R gs://your-bucket-name-hereOnce all the configuration is done we are ready to write code to upload our file to Google Cloud Storage.
First thing first is we are going to add a new route for upload in src/routes/index.js Add the following
server.post("/user/upload", User.uploadUser);Next thing we need to do is export the uploadUser function in src/routes/users/index.js
import getUsers from "./getUsers";
import getUser from "./getUser";
import postUser from "./postUser";
import putUser from "./putUser";
import deleteUser from "./deleteUser";
import uploadUser from "./uploadUser";

module.exports = {
  getUser,
  getUsers,
  postUser,
  putUser,
  deleteUser,
  uploadUser,
};
and finally create a new file called uploadUser.js inside src/routes/users/
TLDR; This file is the controller for /user/upload route. This controller receives the file in the request and using streams the file is uploaded to Google Cloud Storage and the public url of the file is returned in the response.
const Storage = require("@google-cloud/storage");
const CLOUD_BUCKET = "your-bucket-name-here";
const storage = Storage({
  projectId: "your-project-id",
  keyFilename: "/path/to/file/downloaded/in/step/3",
});
const bucket = storage.bucket(CLOUD_BUCKET);
We will be importing Storage module which we installed previously. We will set the bucket name, projectId and in the keyFileName we will put the path of the file downloaded in step 3 and finally we will create a bucket constant which will be reference to our bucket.
const { file } = req.files;
const gcsname = uuidv4() + file.name;
const files = bucket.file(gcsname);
The file object is in located in req.files. W_e will need to create a unique file name for the file which needs to be uploaded. To do so we will use node’s uuid module to create a unique hash and append the file’s name in the end. Finally we will add the file to out bucket using _bucket.file(gcsname)
fs.createReadStream(file.path)
  .pipe(
    files.createWriteStream({
      metadata: {
        contentType: file.type,
      },
    })
  )
  .on("error", (err) => {
    restify.InternalServerError(err);
  })
  .on("finish", () => {
    res.json({
      success: true,
      fileUrl: `https://storage.googleapis.com/${CLOUD_BUCKET}/${gcsname}`,
    });
  });
We will use node’s fs module and pipe createWriteStream which is part of the file function from google-cloud/storage. We also set metadata of contentType to information from our file. We will listen to error and finish events from createReadStream. In the error event we will simply return restify.InternalServerError(err), which just return a status code of 500. In the finish event we return the fileUrl as the public url of the file. which will be at https://storage.googleapis.com/CLOUD_BUCKET_NAME/FILE_NAME
To test this we can create a simple form in HTML using the following code.
<html>
  <head>
    <title>File Upload</title>
  </head>
  <body>
    <form
      action="[http://localhost:3030/user/upload](http://localhost:3030/user/upload)"
      method="POST"
      enctype="multipart/form-data"
    >
      <input type="file" name="file" />
      <button>Submit</button>
    </form>
  </body>
</html>
Once the file is uploaded we can go to Google Cloud Storage website and see that our is file there and if we open the link we will be able to download our file as well.
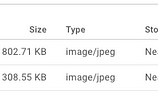
This was a simple tutorial on uploading file to Google Cloud Storage. There is a lot of other features provided by the API which are not demonstrated in this blog. Checkout API Documentation for more functions that are available.